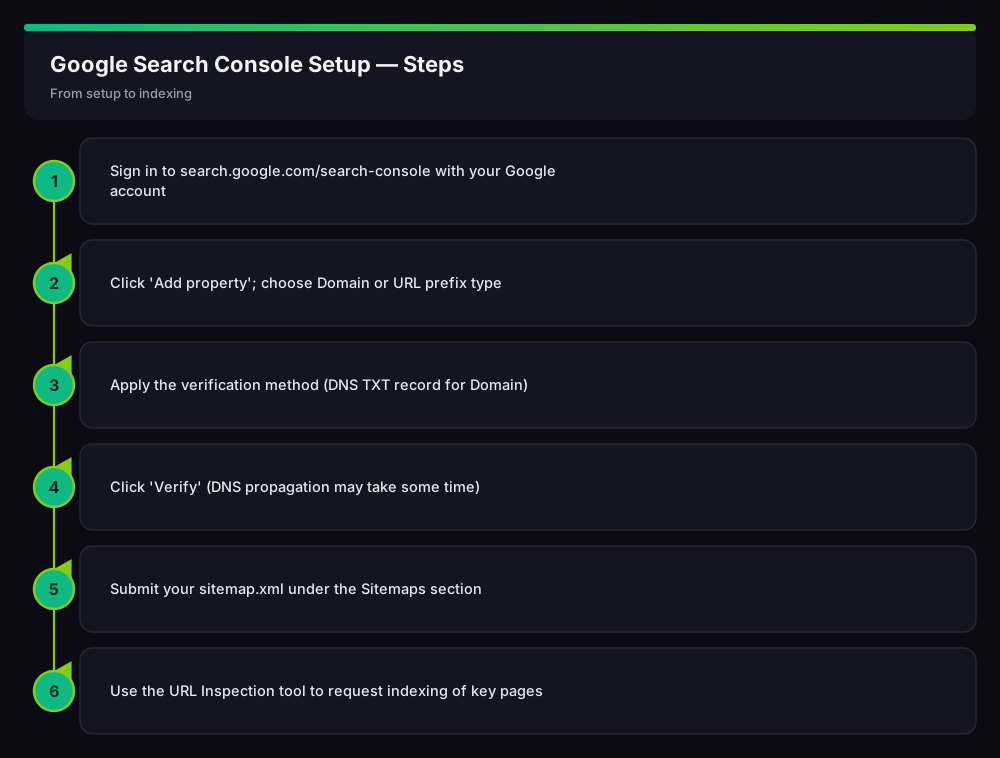
Google Search Console (GSC) is a free, official tool that lets you see and manage how your site appears in Google Search. If you've just launched a website, the first SEO step is adding it to Search Console. In this guide I'll walk you through registering with GSC from scratch, verifying ownership, submitting a sitemap and requesting indexing — step by step. If you hit an error during registration or verification, use the Search Console errors guide linked at the end.
What Is Google Search Console For?
- Shows which queries you appear for, how often, and your clicks (Performance report).
- Shows which pages are indexed, which aren't, and why.
- Lets you submit a sitemap and request indexing of new pages.
- Reports issues like mobile usability, security and manual actions.
The Overall Flow
Search Console setup has six steps. Review the flow first, then we'll do each step:
Step 1: Sign In to Search Console
Sign in to search.google.com/search-console with a Google account. Since this account will have access to your SEO data, use a permanent/business account.
Step 2: Add a Property and Choose the Type
When you click “Add property”, two options appear. Knowing the difference matters:

- Domain: covers all subdomains and http/https variations of
yoursite.com. Requires DNS verification and is usually the recommended option. - URL prefix: covers only the exact address you enter (e.g.
https://yoursite.com). Offers several verification methods (HTML tag, file, Google Analytics).
Step 3: Verify Ownership (DNS TXT)
For a Domain property, the most common method is a DNS TXT record. Search Console gives you a TXT value, which you add to your domain's DNS settings (in your hosting or domain panel).

- Copy the
google-site-verification=...TXT value Search Console provides. - In your hosting/DNS panel (cPanel > Zone Editor or your domain provider), add a new TXT record; set Host/Name to
@and Value to the copied value. - Return to Search Console and click Verify.
DNS changes can take from a few minutes to 48 hours to propagate. If you get “Verification failed”, don't panic — wait a bit and click Verify again.
Step 4: Submit a Sitemap
Once verified, give Google your site's map so your pages are discovered faster. Open Sitemaps in the left menu:

- Next to your domain, enter
sitemap.xml(on most sites the full address ishttps://yoursite.com/sitemap.xml). - Click Submit.
- Wait for the Status column to show Success; the number of discovered URLs grows over time.
Step 5: Request Indexing with URL Inspection
To quickly introduce an important or new page to Google, paste its address into the URL Inspection tool at the top. If the page isn't indexed, click Request indexing. This speeds up indexing but doesn't guarantee it.
Step 6: Monitor the Performance Report
After a few days, data starts to accumulate. The Performance report shows total clicks, impressions, average CTR and average position.

This report shows which queries you appear for and which pages attract interest, so you can shape your content strategy accordingly.
If you ran into “ownership not verified”, “couldn't fetch sitemap” or “page not indexed” during setup, see our Search Console errors and fixes for detailed solutions.
Frequently Asked Questions (FAQ)
Is Google Search Console free?
Yes, it's a completely free, official Google tool. All you need is a Google account.
Should I choose a Domain or URL prefix property?
Choose Domain if you can; it groups all http/https and subdomain variations into one property. If you don't have DNS access, URL prefix can be easier.
When will my site appear after adding it to Search Console?
Verification is instant, but performance data starts accumulating within a few days. Appearing in search depends on indexing and authority.
How do I find my sitemap address?
On most WordPress sites an SEO plugin generates the sitemap automatically; the address is usually yoursite.com/sitemap.xml or yoursite.com/sitemap_index.xml.
Conclusion
Google Search Console is the most important SEO step after launching a site. Adding a property and verifying via DNS, submitting a sitemap and requesting indexing take only minutes. The Performance report then lets you monitor your visibility in Google.
Related Guides
- The Most Common Google Search Console Errors and Fixes
- How to Install WordPress: A Detailed Step-by-Step Guide
Need help with your website, hosting or SEO? Get in touch with me.